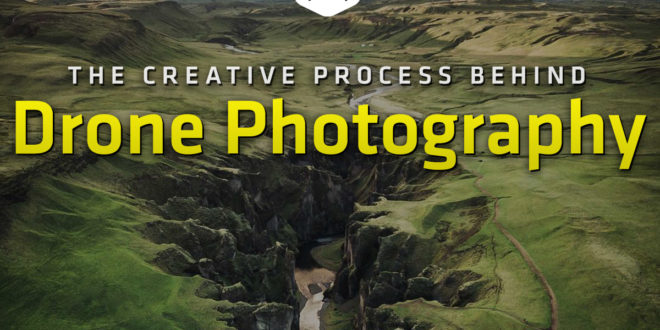
In this post I walk you through some pre and post-production techniques and tips related to lighting, angles, color theory, lines and shapes to help you create better drone photography.
Properly considering and understanding the creative process behind drone photography is a powerful way to increase the quality of your drone imagery.
I’m Brad Walls (@bradscanvas), and I have fallen in love with capturing imagery via the sky.
Once drones became more affordable, I was one of the first to get a DJI Mavic Pro back in 2016 which I consider to be one of the best creative decisions I have ever made.
I’ve since learned some things about the creative process behind taking great drone photos and that is what I want to share with you today.
Now let’s get started…
Pre & Post Production – what is it?
Creative ‘things’ require a timeline of events, for this particular blog post I will be diving into the components of Pre & Post Production.
Pre-Production & Production is the planning & taking of the image while…
Post Production involves collecting, editing and beautifying your imagery.
Each component is worth considering as each one is connected and leads to creating an overall seamless workflow.
In the next sections, we will look at some of my favorite images and discuss the methods that helped define that shot as well as better understand best practices for the production process.
“Find the light first and then the subject”
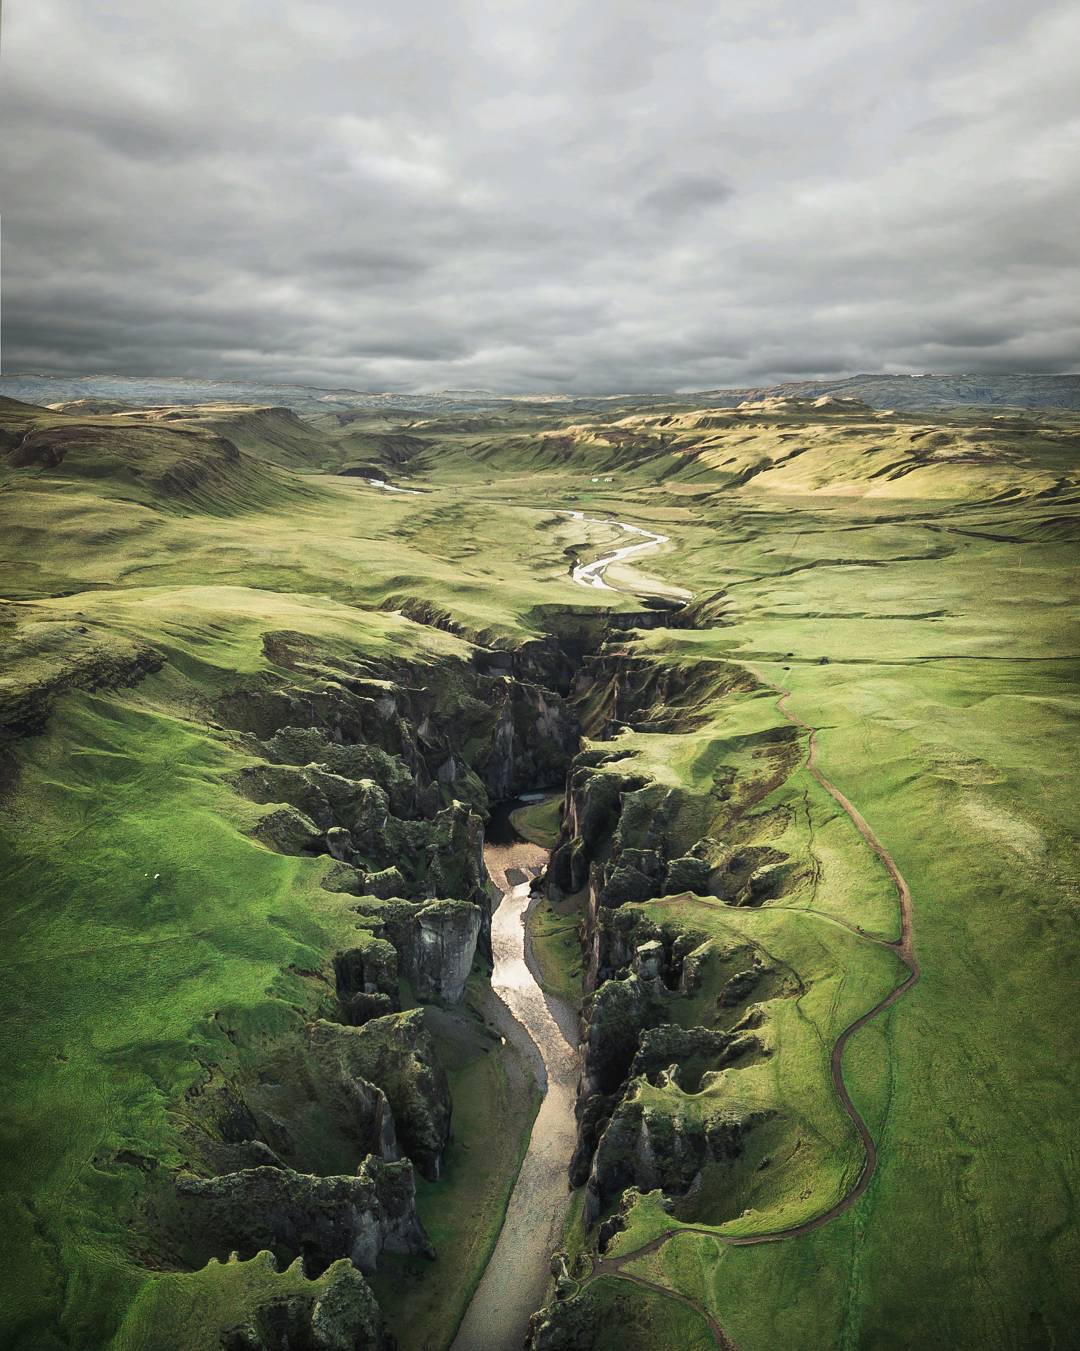
Fjadrargljufur Canyon, Iceland
Find The Light First (Pre-Production)
A quote that stuck with me through my photography is “find the light first and then the subject”. I cannot stress this point enough especially with aerial pre-production photography.
As drone pilots, we don’t have the luxury of setting up artificial light boxes so finding the perfect lighting and angles is paramount.
Creating natural contrast from the air is impossible without shadows and is more influential than “perfect light”, whatever that means anyway. I am a fan of how sunset light looks over sunrise light, due to how the light scatters across the sky because of pollutants & wind-borne particles which usually results in larger color sets to play with in post.
The image below was caught right as the sun was setting, which displays the beautiful deep yellows and oranges that a great sunset can provide.
As you can see above, I caught the light as it ran vertically halfway through the trees which resulted in a line of light. Interestingly, the surrounding areas around the island then created a natural contrast.
This image was actually just sitting in my library for months until I realized how much potential it had after looking more closely at its potential
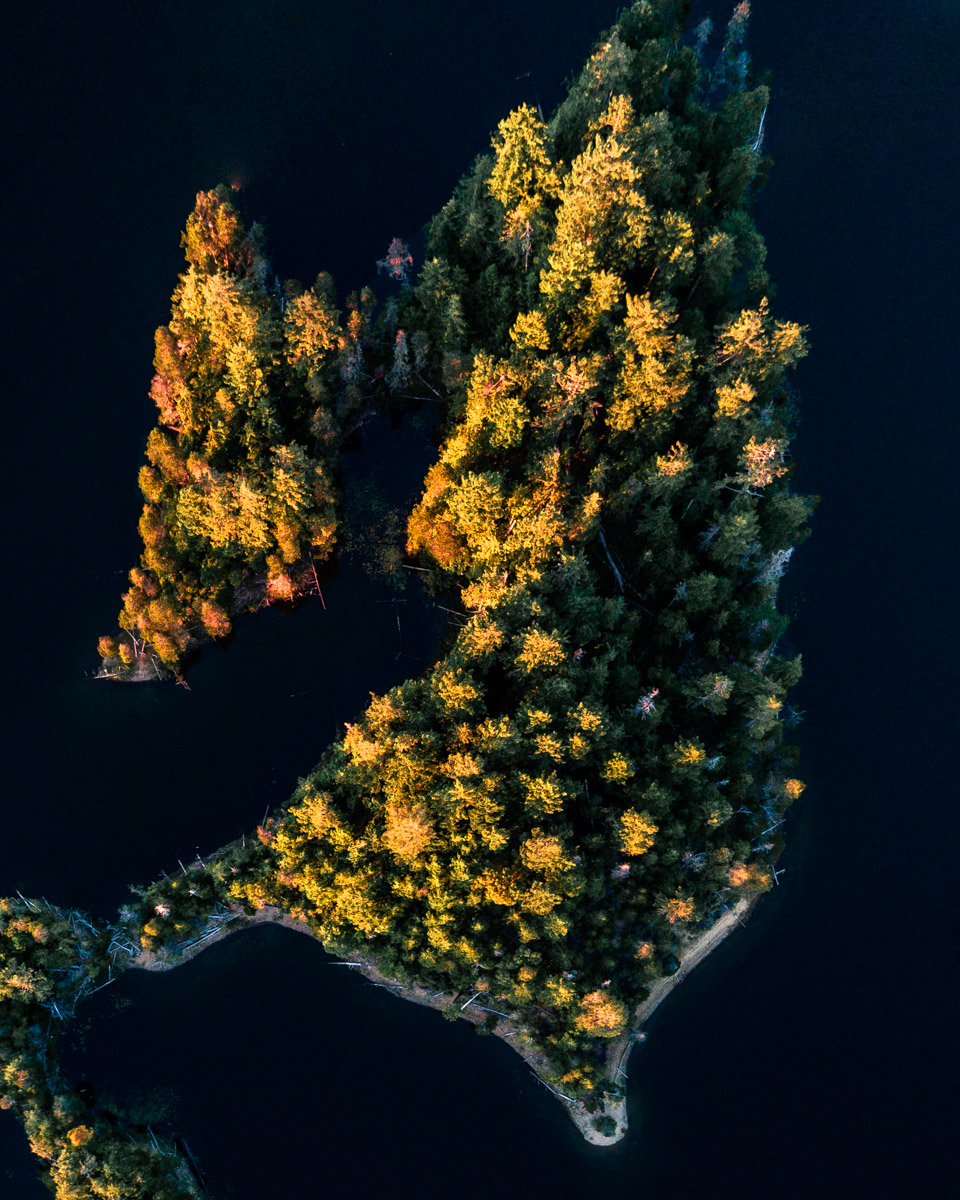
Vancouver Island, British Columbia
Select Your Angle (Pre-Production)
As a new aerial photographer, exploring angles should definitely be your number 1 priority in pre-production. Angles form the foundation of the shot and set the tone for the other features which include two main types of angles from the air:
- Oblique Angle – which includes images that are easier for the mind to understand because the line of sight contains a horizon
- Vertical Angle – often referred to as a “top-down” shot, because the camera creates images with the camera facing 90 degrees towards the surface
The image below is an oblique angle image taken at sunset on Hyams beach (which has the whitest sand in the world).
Personally, the oblique image takes a lot of practice to nail, especially when working with different exposure ranges.
Oblique angles generally result in higher exposures above the horizon and lower exposures below the horizon.
This is why a best practice is to use a 3 or 5 bracketed shot approach, which then requires you to merge them in post to create a single image.
Shooting this way prevents any image data loss due to overexposure which blows out the highlights or underexposure which crushes the blacks.

Think About Color Theory (Post- Production)
Color theory can cover a vast amount of topics, but the component I am most concerned with for this blog post is how colors harmonize with one another to create a visually pleasing experience for the viewer.
I have been researching how colors harmonize with one another in an effort to discover how to better bring flat, dull images to life.
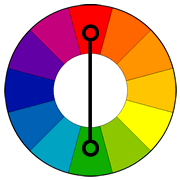
There are six basic color harmonies which you can read more about here, but I will briefly share about 3 of them that I use regularly when creating my imagery.
Complementary | tigercolor.com
- Complementary – Colors schemes that opposite one another on the color wheel, e.g red & green, which instantly creates contrast.
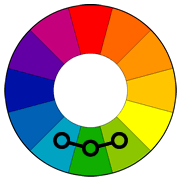
Analogous | tigercolor.com
- Analogous – Color schemes based on colors that are next to each other on the color wheel. They usually match well and create serene and comfortable designs, which can be perfect for sunsets.
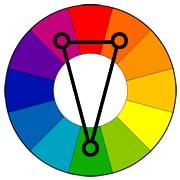
Split complementary | tigercolor.com
- Split complementary – A variation of the complementary color scheme. In addition to the base color, it uses the two colors adjacent to its complement. This creates a similar impact to complementary but less is less tension.
To further understand how this plays out with my drone photography, let’s take a look at the image below of Garibaldi Provincial Park.
This particular image is using the analogous color scheme because it is compromised of about 60% blue, 30% green and a minimal amount of yellow for the remaining 10%.
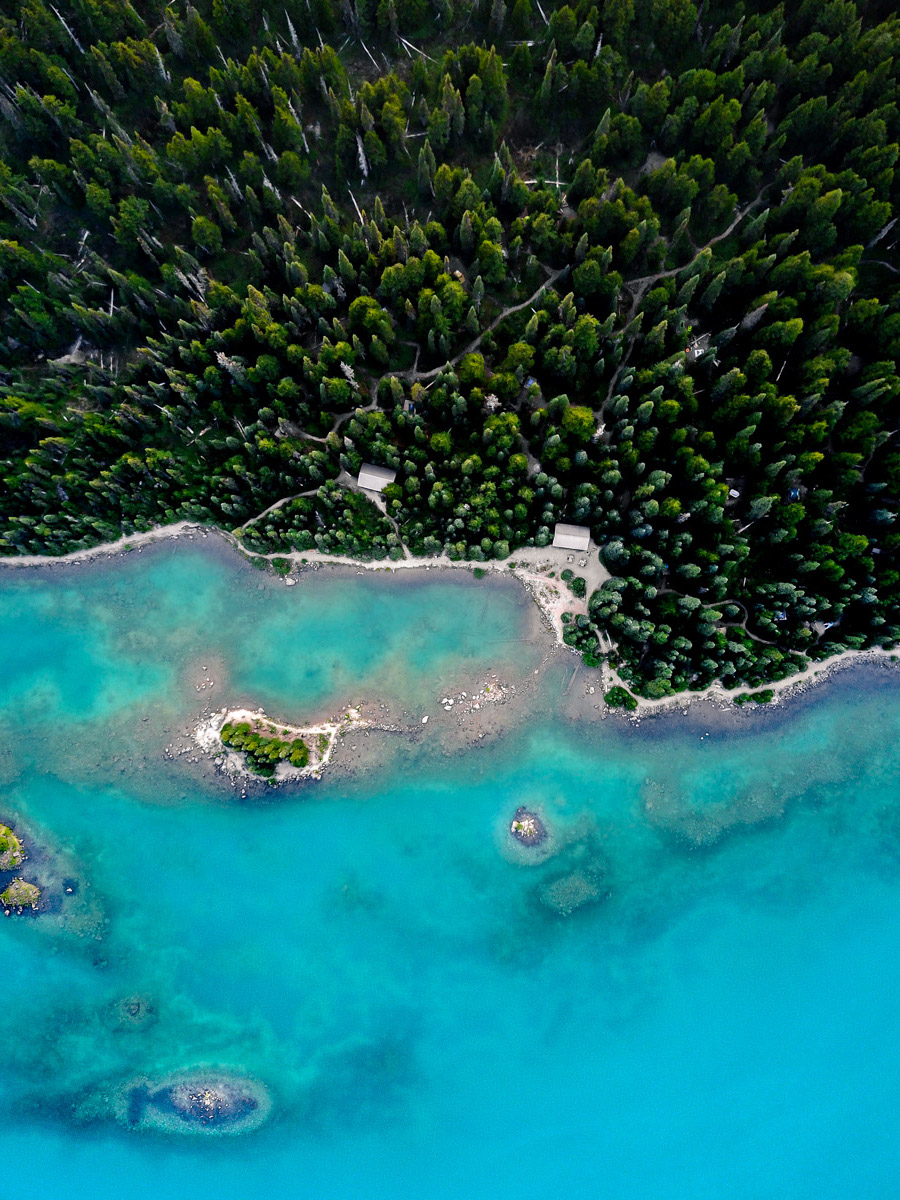
Garabaldi Provincial Park, British Columbia
Compose For Lines & Shapes (Post & Pre-Production)
The standout feature of aerial photography is the ability to use lines and shapes to create a mood and visual journey for the viewer.
Drone pilots do this by controlling how a viewer’s eye moves about when looking at an image.
From above, drone pilots can easily manipulate the camera’s position to create one of the 4 dominant line shapes we see in nature.
Each line shape has a unique impact, so feel free to read up more on this interesting subject but I will briefly touch on them below:
-
- Horizontal – Indicates a lack of change, like the image is static in time.
- Vertical – Projects a sense of stability and tranquility and is easy to achieve in drone photography
- Diagonal – Creates dynamic & powerful images, leading the viewer’s eyes back and forth along the diagonals
- Jagged and Irregular – Creates a sense of unease, and is harder to achieve in drone photography
The Niagara wine image below was originally a typical horizontal image, but it lacked any real distinct visual impact.
However, when I rotated it 45 degrees the image seem to come to life which made the message more clear because of the dynamically changing 3 layers which consist of the road, grass & shrubbery.
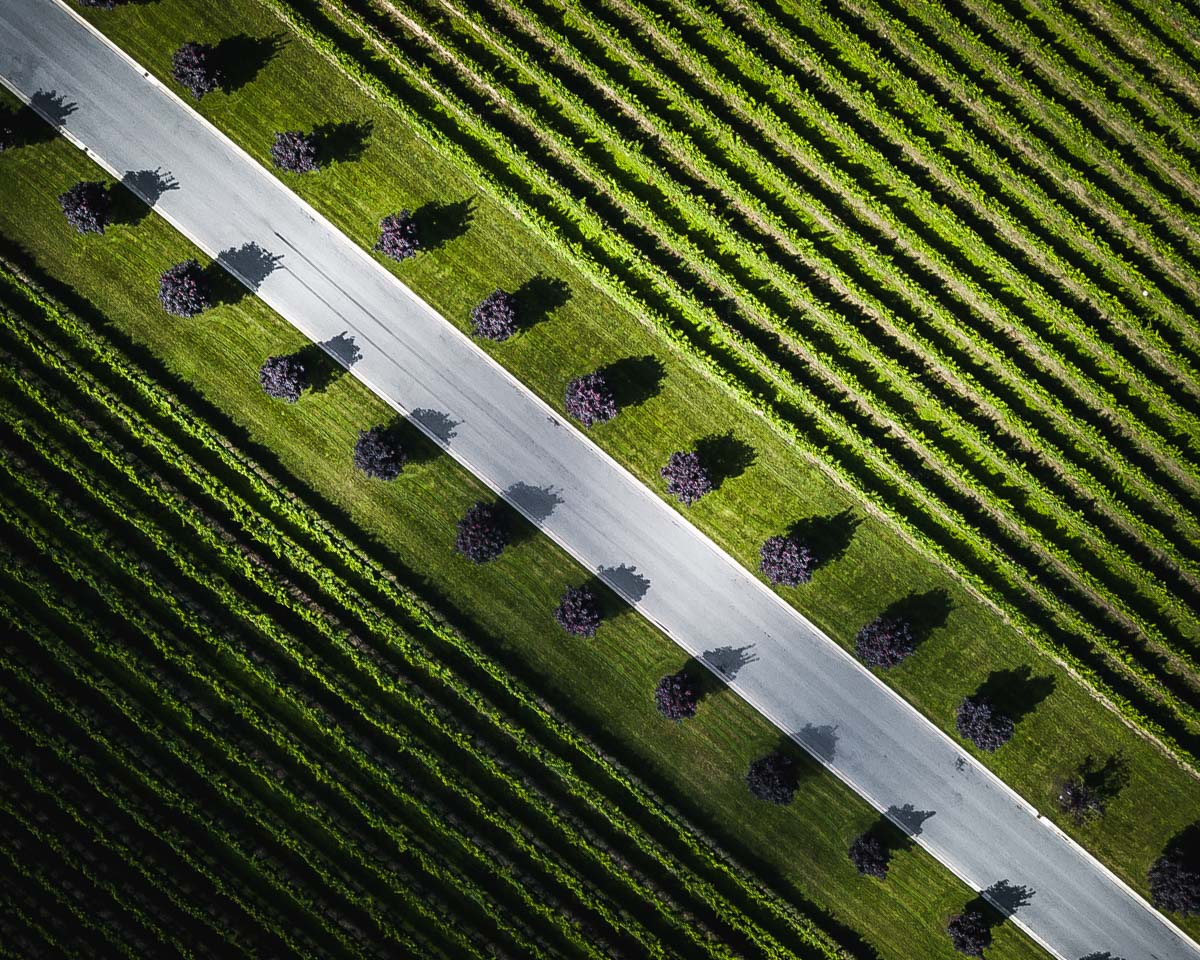
Niagara, Ontario
Conclusion
While drone photography is still a pretty new medium, new knowledge is being created and shared all the time.
That’s why I am always being inspired by new drone photographers on Instagram and which I think is a fantastic medium to start to dissect how others are creating their imagery.
I hope you now have some pre & post production drone photography tips that can help add a little something more to your creative process and who knows, maybe I’ll see you in the air 🙂

