Isn’t it really easy lately?
You have a digital digital camera, with superb decision that takes prime quality photos for a comparatively inexpensive worth. It information to reminiscence playing cards or onerous drives in particular person digital recordsdata per shot.
You stick it within the pc, and you may immediately watch again precisely what you need to and offload it for enhancing. No messing with tapes, no ready in real-time for the tapes to switch to the pc, and no want to the touch up the footage.
And, the cameras fly now! On drones, that’s (however let me know when you discover a digital camera that may fly by itself with out a drone J ). The shot already appears superb proper off the drone!! Doesn’t it?
But what when you might make it look even higher?
[Want to go straight to the 5 suggestions? Just click on right here.]
Yes, that tremendous, one-of-a-kind, completely timed, sundown shot over the mountains of Iceland can in reality look even higher than when it comes straight off the drone.
Color correction is the key, and that is one of the factors I at all times emphasize to my college students within the Aerial Post-Production course I train in partnership with UAV Coach: The secret ingredient for separating your self from the competitors is all about realizing methods to do coloration correction. (But shh, don’t inform anybody!)
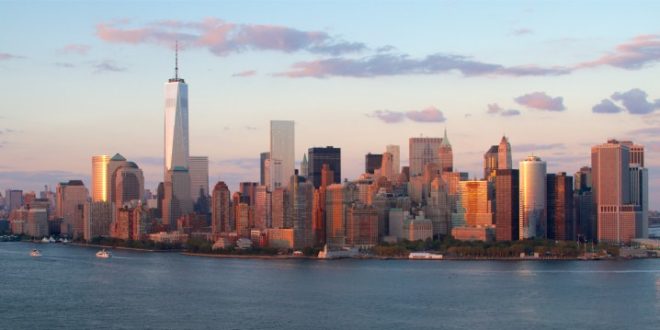
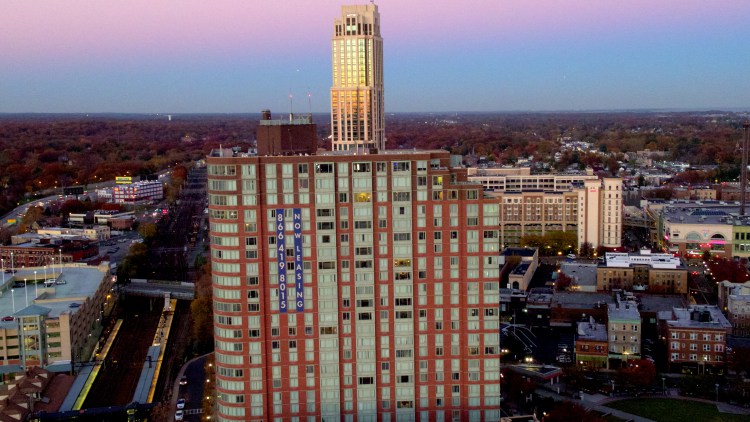
At my firm, Cinematic Aerospace, we coloration appropriate virtually all of the drone footage we shoot earlier than sending it to shoppers for assessment, particularly these stunning skyline photographs of New York City. New York City aerial cinematography at all times appears good, however throw a fast coloration cross on the footage, and you’ve got one thing actually magical!
The time period “color correction” is mostly used to refer to 2 totally different processes. There is precise coloration correction, after which there may be coloration grading. I often discuss with each collectively as simply coloration correction, or “coloring.”
Color Correction
Color Correction is the method of adjusting the clips you shot to get good publicity within the picture. You do that by balancing the sunshine within the shot.
Color correction and grading are artwork types in and of themselves. Just prefer it takes an editor a few years and far expertise to grasp their craft, the identical holds true for a colorist. For main productions (and even many smaller ones lately) the colorist is a separate job from the editor. They typically don’t even discuss to one another a lot as a result of as soon as the edit is completed, the colorist takes over and colours that ultimate minimize. It doesn’t require a lot collaboration with the enhancing division aside from to get the recordsdata.
For most drone pilots although, they find yourself with an all-in-one job: pilot, digital camera op, editor, and colorist, amongst the opposite duties concerned in truly operating their enterprise.
It is necessary to notice that coloration correction refers to work executed in post-production, that’s, working on the clip after it’s already shot. There are strategies you should utilize to regulate the colour and create correct publicity while you’re capturing, however coloration correction as we’re going to speak about it’s doing this stuff with a pc, with the completed shot.
Color correction truly doesn’t have a lot to do with coloration in any respect right here. It is extra about adjusting publicity and lightweight ranges to attain a balanced shot, with fairly pure colours.
You can use Waveforms and Vectorscopes to assist with attaining a “proper” coloration correction, however we’re going to focus on doing it by look alone, since our aim is to simply make fast coloration passes on your photographs, simply to the touch them up to your shopper’s eyes. There actually is an entire science to paint correction, and as a lot as I like to speak all day lengthy about chromatics and issues like coloration areas, frequencies, wavelengths, and spectrum analyses, one thing tells me you aren’t right here to recall classes out of your highschool physics class.
Color Grading
Color Grading is the method of making inventive selections to boost your footage to higher inform a narrative, or convey a sure feeling or emotion to your viewers.
Color grading can contain coloration correction, by adjusting the sunshine ranges, but it surely additionally generally entails adjusting the precise coloration of a shot, too. The most typical coloration grading may consist of boosting a sure coloration within the shot, and even including a coloration that isn’t very distinguished within the uncooked footage.
There aren’t actually any proper or incorrect methods to do coloration grading. It all relies upon on the texture you need the footage and the minimize to have.
WARNING: Color correction (and coloration grading) are NOT meant to interchange the method of correctly planning your photographs and capturing them with an excellent publicity within the first place. You ought to at all times shoot your clips with correct publicity to start with, or not less than as near correct publicity as you may. Even although it could appear to be magic, coloration correction will not be a way that permits you to say “Ehh, I don’t want to setup my camera correctly right now, so I’ll just fix all the issues in post-production”.
While post-production instruments are getting more and more higher at letting you repair errors in capturing, as a rule, when you mess one thing up whereas capturing, it’s onerous to fully repair it in publish. For instance, when you shoot one thing very overexposed after which attempt to lower the publicity in publish, it isn’t going to work as a result of the overexposed elements of the shot most likely “clipped” within the sensor (reached a stage that the sensor simply can’t course of and document).
So, if the info for that half of the picture didn’t even get recorded, what do you assume will occur if you lower the publicity in publish? It received’t be fairly…
So, coloration correction and coloration grading are instruments that make it easier to improve a shot that already appears not less than considerably good, as a result of it was filmed correctly from the start. It isn’t a magic wand that replaces good planning from the start.
5 Pro Tips on Color Correction
Below are 5 “pro tips” to assist the do-it-all drone pilot by way of coloring their particular person clips proper after filming or a minimize of their reel.
1. Start interested by your coloration correction course of earlier than even capturing your footage
Part of setting your self up for correct coloration correction in publish is ensuring your digital camera is configured appropriately.
Besides exposing your picture appropriately, you need to shoot with a “flat” coloration profile. This produces a picture with the smallest quantity of in-camera “color” as attainable, that means it provides you extra latitude to work with the picture in publish.
It might look nicer proper off the bat or simpler simply to document utilizing a standard or default coloration profile, however keep away from it as a lot as you may. There are sure conditions the place I really do need to take the footage off the digital camera and have it look semi-nice to start with, however 99% of the time I document with a flat picture profile.
In DJI drones/cameras the profile is named “D-LOG”, in different cameras it varies, however lots of time it’s some variation of “log” or “neutral”. If you’ve a digital camera that information RAW footage, just like the X5R, X5S, RED Epic, or ARRI Alexa, the RAW footage ought to already be in a flat coloration profile, as that is the character of capturing uncooked within the first place. You are capturing the frames with as little processing from the digital camera as attainable.
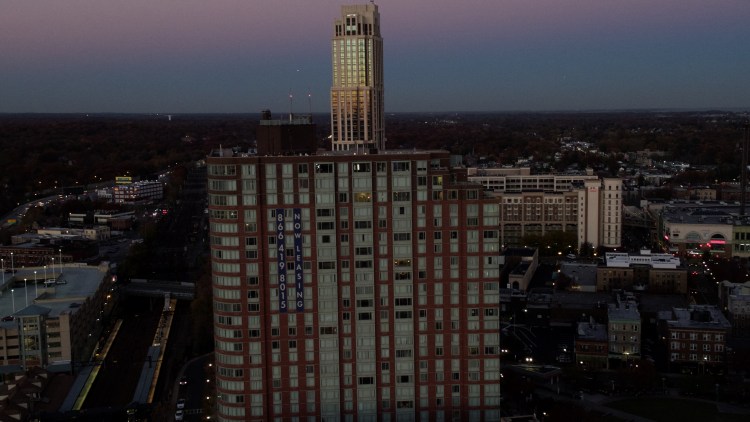
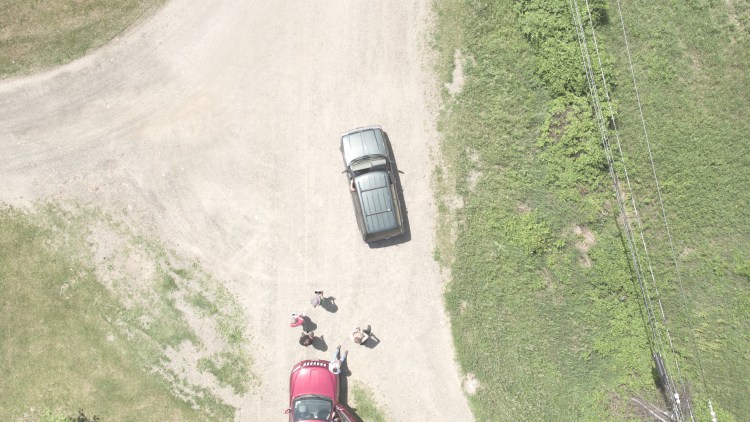
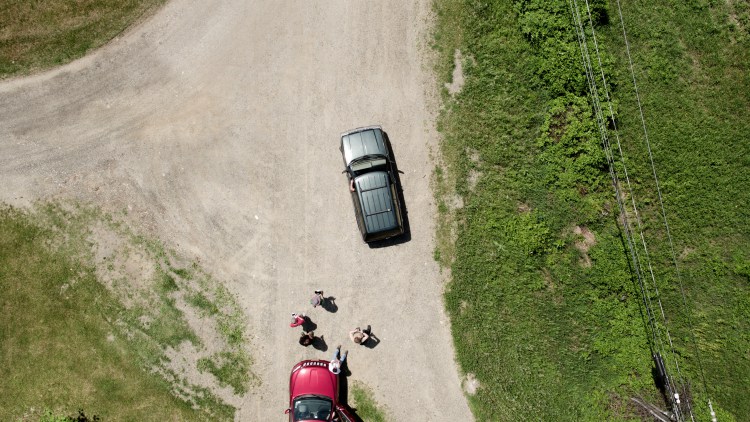
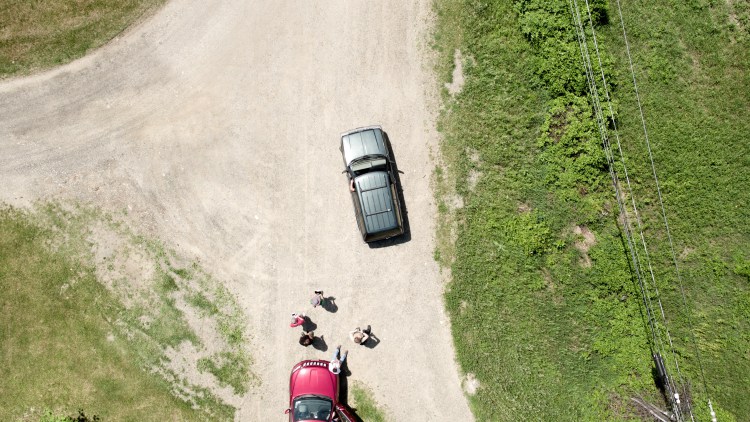
Normal profile
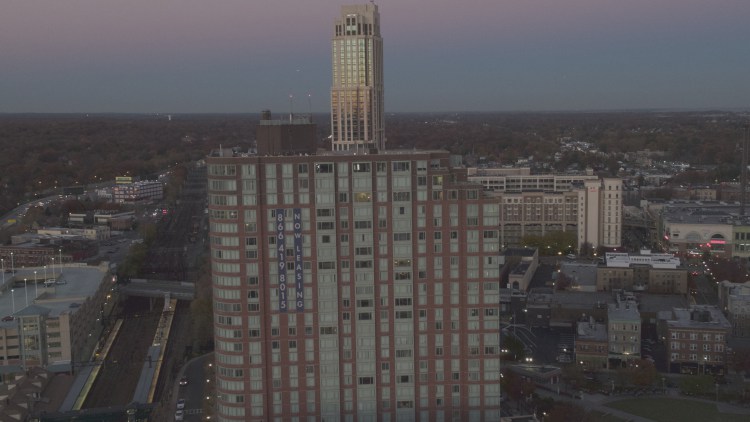 Flat profile
2. Start adjusting the blacks (additionally known as elevate or shadows) first
A time period you may hear folks use when referring to primary coloration correction is “crushing the blacks”. Shadows discuss with the darkest areas of the picture, whereas whites (or highlights) discuss with the brightest elements. Midtones (mids) discuss with the sunshine ranges in between the black and whites.
While the reply isn’t at all times to “crush” them (i.e., transfer them down), most photos shot through the day may benefit from lowering the shadows, successfully providing you with some instant distinction.
This particularly applies when working with footage shot with a flat profile, as a result of it received’t have a lot distinction to start with. Once you get these blacks “crushed” or decreased in worth you’ve the baseline with which to start the remainder of the colour correction course of.
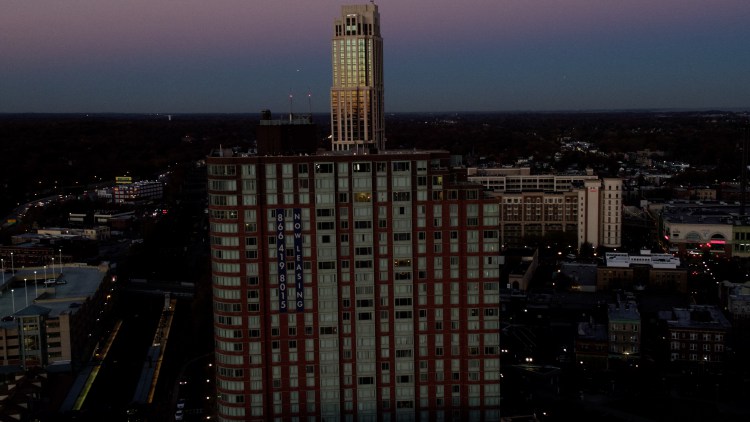
Blacks crushed
three. Adjust the highlights and midtones subsequent to attain good publicity
With the blacks adjusted correctly to your publicity, transfer on to the highlights subsequent.
Increasing the highlights provides you extra of that distinction that helps most photographs look nice. It’s necessary to verify to not modify the highlights an excessive amount of the place absolutely the brightest elements change into overexposed.
In primary coloration correction, you might have to accept a steadiness inside anyone of the sunshine ranges you’re adjusting. In superior coloration correction, you are able to do issues like create energy home windows and masks that can help you isolate sure elements of the picture and place separate units of changes on them, i.e. permitting you to regulate all of the highlights within the picture EXCEPT that space that’s already overexposed as a result of the digital camera wasn’t set appropriately.
The final step in adjusting the sunshine ranges for publicity is the midtones. Once you’ve the distinction you need from shadows and highlights, use the midtones to steadiness out the picture general and obtain the ultimate publicity of your shot.
When adjusting all of these gentle ranges, it’s greatest to park your play head on a body that’s most consultant of the entire clip, as a result of until you’re reducing up your clip or utilizing superior coloration correction options, the changes you make will likely be made on the entire clip within the timeline.
If you make the changes whereas taking a look at a body proper at first, however that body is underexposed since you adjusted the aperture mid-recording 30 seconds after the beginning, then your total coloration grade will likely be off, since it’s primarily based on that starting body’s publicity.
Take the time now to playback or scrub by way of your shot with the completed changes. See the way it appears. Disable the changes in your NLE or coloring software program quickly to check the now corrected shot with the unique shot. Go again and make additional changes as you see match. Get the publicity set for what your imaginative and prescient of the shot is.
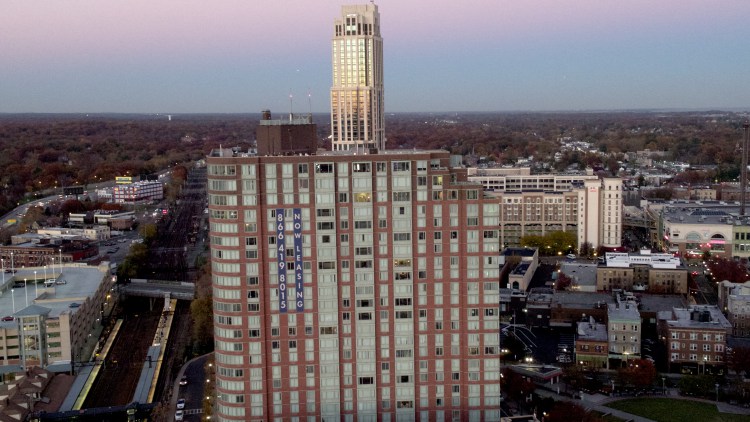
Highlights and midtones adjusted
four. Boost your saturation to attain vibrant photos (if relevant)
The very last thing I need to do is get anybody within the mindset that there’s a positive hearth option to coloration footage and make it look nice. So a lot relies upon on your footage, your inventive fashion and the software program you’re utilizing.
BUT, for a fast and soiled coloration cross like we’re doing right here, for many daytime, vibrant, aerial footage a lift in saturation can actually go a great distance. You need that footage to pop!
Make positive to do that moderately although. Too a lot saturation is unnatural of course and will make the picture too “surreal”. Play with it and see what appears greatest to your coloration look aim. Usually solely a small adjustment of the slider(s) is required.
Boost in saturation
5. Don’t be afraid to experiment when vital, however don’t overdo it both
Use the following pointers as a baseline to get a primary coloration cross on your clips or minimize to make them stand out when sending them to shoppers or importing to the Internet. But extra importantly than anything, don’t be afraid to experiment together with your coloration correction and grading course of.
Just like with most different creative processes, practising coloring frequently will actually assist construct up your confidence. And confidence actually is essential right here, as a result of each particular person is totally different of their method to coloring. It is your work and your name (until the shopper desires one thing particular).
Even if a shopper desires a particular look, each colorist has their manner of taking a look at and approaching the shot. Don’t be afraid to get loopy with coloring some photographs and to check out distinctive appears. You could be shocked with the outcome.
It’s all half of the inventive course of. But simply ensure to HAVE FUN doing it although, as a result of that’s what actually issues!
An total lesson, that includes a screencast video, in Aerial Post-Production 101 is devoted to the essential coloration correction course of in Apple’s Final Cut Pro X. Check out the course homepage to study extra concerning the course and what else it presents.
Final Grade
Here’s one other instance of the complete course of:
Flat unique shot
Black crushed
Highlights and midtones adjusted
 Final grade

Christian Tucci
In addition to his work at Cinematic Aerospace, Christian is the trainer of Aerial Post-Production 101, a distant course he created in partnership with UAV Coach for drone pilots seeking to sharpen their post-production expertise and ship prime quality completed photos to their shoppers.