Guest post by Terry Holland —

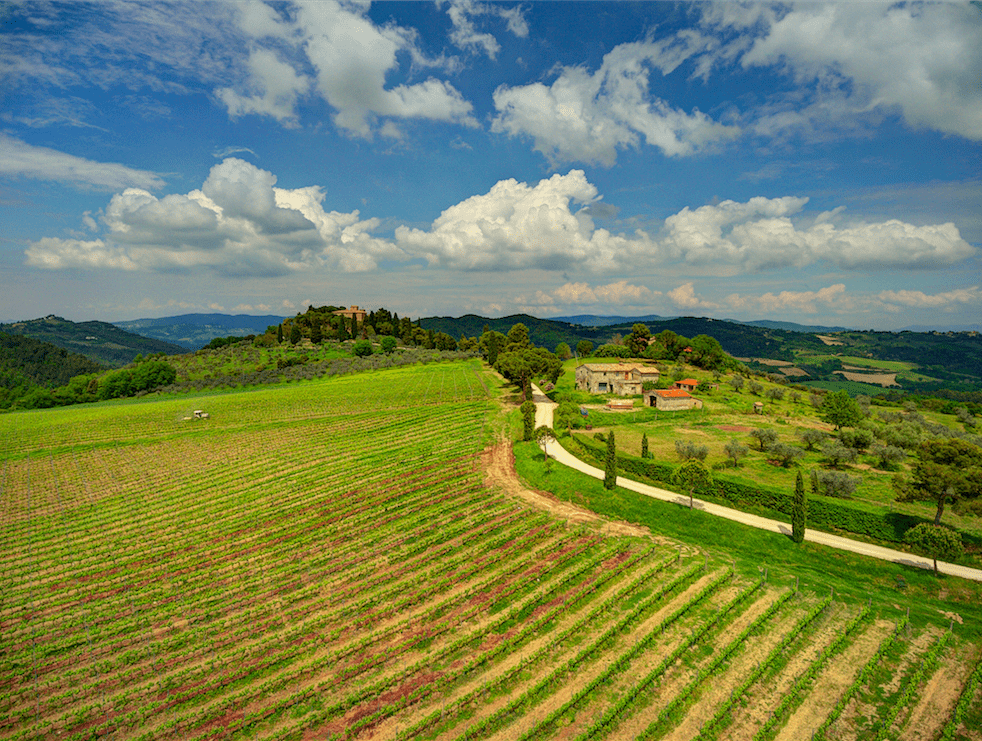
Farmhouse and Villa
After flying my Phantom 4 for several months it’s time for a follow up on my initial dronelife.com review. While my major reservation with the craft is that the media quality of the Phantom 4 doesn’t match the micro four thirds sensor that I fly on my S900 (and shouldn’t because that’s not the role the Phantom was meant to fill in the DJI product lineup), I find that the more I work with the P4, the more reasons I find, big and small, to like it more.
We’re still in a rapid growth phase in the drone industry, one that will become more technically advanced with each passing year but for right now the Phantom line fits very nicely for providing DJI’s target market with a strong portfolio of capabilities in a smartly designed, very affordable platform. It’s getting comfortable to work with and reminds me of some of my favorite tech, it’s easy to use for some simple work, but capable of going levels deeper if you want to take on more complex challenges.
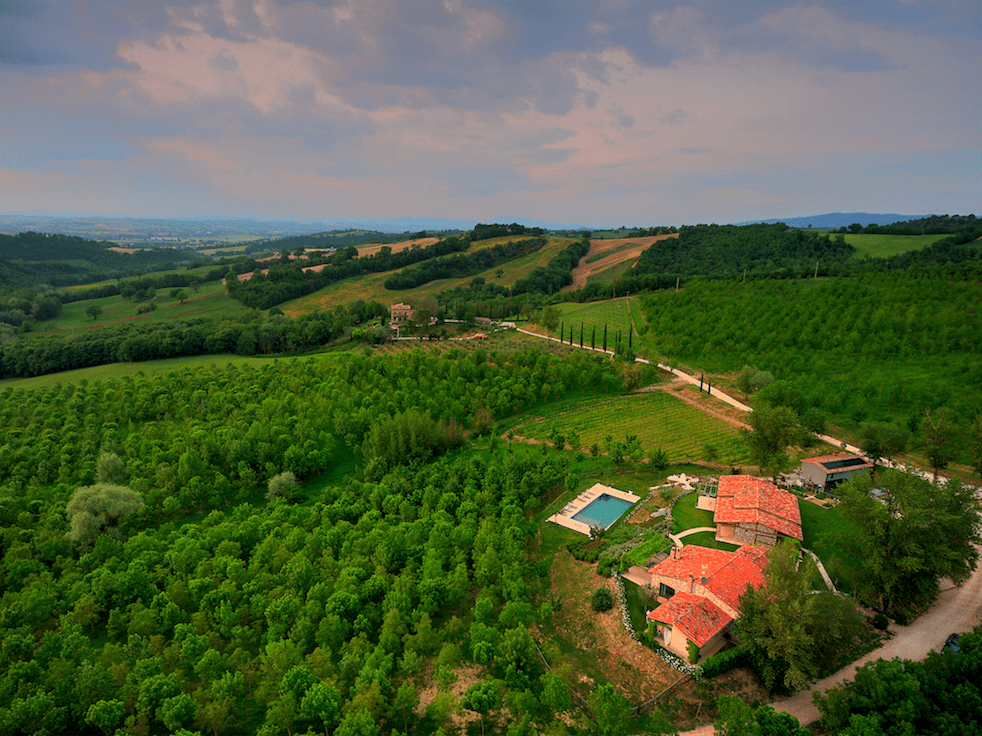
I recently returned from a four day drone shoot for a client in Italy and took the opportunity to create some exclusively Phantom content, video and photo, to determine if the output would meet the minimum requirements for professional media content. Namely, are the production values consistently strong enough that none of them distract noticeably from the positive viewing of the footage? This may seem like a low bar, but in the world of accessible media, it seems to be the lowest common denominator by which we can regard a piece as being “good enough”. “Good enough” is never my creative goal, but sometimes it has to be a technical reality.

Here are a few practical tips and observations I found while using my P4: P4 RC has two anchor points, making for a more secure neck lanyard attachment. Ran into the situation several times when the craft was warming up on an unpaved road that was loaded with crushed rock and soil that is known to have a high iron content and several times this caused start up issues with the compass calibration readings. I had to hand launch, by myself, which is something that requires a good bit of caution, especially when flying craft that don’t have prop guards. It also requires a steady hand to hold the craft level and extremely still while the IMU and other components are initializing and warming up. A little practice and this is a skill that is not too hard to master but be very cautious when you are holding the craft in one hand and jockeying the sticks into the prop starting position. Once the props fire up, while still maintaining a steady but loose grip on the craft, boost the throttle with your other hand until you can feel that your quad wants to pull away from your grip and then simply release it. Don’t toss it or shove it away at an angle, just let it fly up quickly from your grip and then let the throttle pop back to neutral so the craft will hover while you get two hands on your controller. A neck lanyard for your RC is an absolute must for this move!
In reasonable conditions the Phantom 4 is stable enough to usably shoot a couple series of exposure bracketed photos that can stretch your bracketed exposure latitude when you merge and adjust them in your post production workflow. Pretty impressive for this little quad.
Four full days of shooting allowed me to put the Phantom through some additional hours of evaluation. I did notice the utility of the steady dual GPS/Glonass mid-air positioning capabilities on more than one occasion. The Phantom 4 is as solid a position holder as you should ever likely need to look for in a craft in this price range. Centimeter accuracy is available in significantly more expensive units, but the repeatability and stability in the P4 was solid.
One thing that is hard to measure, but definitely noticeable as the shoot progressed, was my increased comfort level flying the Phantom 4. If you have experience flying earlier generations of drone platforms you know what it’s like to have random behavior responses pop up while you’re flying. Unexpected drift, movement that is contrary to your usual stick input, weird little moments of “What just happened there?” all combine to build a healthy level of low level anxiety when flying, but I found that I became more relaxed with the P4 the more I flew it. It dependably performed as it was supposed to and the more I fiddled around with the different flight modes the more I become confident that I could use the advanced capabilities without unintended consequences. Definitely makes the whole flying experience a bit less stressful, even for very experienced flyers.
Battery life has been pretty consistent. All four of my batteries are typically good for flying in the mid-twenties minutes range and even when pushing the performance a bit I always get at least twenty minutes per battery. I purchased a Polar Pro filter kit that had a pair of neutral density filters (ND4, ND8)and a polarizing filter to see how they worked in certain lighting environments.While the ND filters were definitely worthwhile in allowing me to select my preferred ISO / shutter speed combinations, I had enough sharpness problems with the polarizing filter that I suspect the filter may need replacing (I’ll follow up further on filter use in a future article). As an aside, while shooting at a local lake in advance of an aquacide application to combat Eursasian Milfoil, I found that the photos shot with the unfiltered lens on the P4 showed remarkable water penetrating views that make me suspect that the DJI lens is factory coated well enough for most applications that would otherwise suggest the need for a polarizer.
When you use a neck strap and have a larger screen device (the bigger iPads) on your RC, you are putting some reasonable weight on the small clasp from the neck strap. Over time, the strap I was using (third party) started to deform from the strain of use and I had to put on a stronger circle clip from an old key ring to accommodate the weight.
Also be aware that care is definitely required if you use filters on your P4. There’s a trick to unscrewing and remounting filters on the camera. Grasp the edge of the existing lens protection with your fingers (never any off-the- shelf pliers or wrench),while just as firmly gripping the gimbaled camera to avoid any undue stress on the gimbal itself. After slowly unscrewing the existing filter off, be very careful to align the threads of the filter that you are mounting on the camera with the receiving threads on the camera body. Holding the filter as close to exactly parallel with the lens face, screw the filter gently in a clockwise direction, trying to carefully get the threads to “catch”. Never, ever apply more force than is appropriate to attach the filter. If the filter doesn’t easily screw on, or starts to screw on and gets harder to continue, then stop, back it off and try again. These parts are made with fine threads in a lightweight metal and it is not difficult to apply too much force and end up cross-threading your filter and camera, resulting in a much bigger problem than you ever want to deal with. Small parts only need small amounts of torque, be careful on all your drone parts to avoid over-tightening.
Another interesting thing I found with using the Polar Pro filters is that in order to attach the plastic camera stabilizer (that comes with the Phantom 4) for storage or travel, I had to remove the third party filters because the grip ring design was slightly larger than the provided DJI lens cover. This increases the opportunity for filter mounting errors and isn’t as convenient as leaving the filter on. At some point I’d like to try some of the stock DJI filters and see if that solves this minor problem. So all in all, I have again found the Phantom 4 to be at least as good a craft as I had expected and in some cases, better. It’s a good unit that I am happy to have purchased.
Here’s a link to a version of the short branding piece that I shot in Italy with the Phantom 4 (https://vimeo.com/167192525 ). The end use will be strictly web-based, and when viewed in 1080p, does the trick (I hope!). With the exception of the interior shots provided by the client, everything was shot entirely with the Phantom 4. The sharp eyed among you can probably pick out the bracketed exposure photo that I inserted with the Ken Burns effect as a moving shot, I think it compared well to the actual video pieces and speaks to the quality of the AEB photos the Phantom 4 can shoot. And for those of you who wondered, I had no problem clearing American and Italian airport security with the P4 as a carry on. I had discharged the LiPo batteries before arriving at the airport, familiarized myself in advance with the regulations regarding flying with batteries (size, number, and NOT in checked baggage) and had no delay other than in the Rome airport where a mildly put out supervisor had to come and look at the drone because an initial local screener had no idea what the rules were regarding its transport. I reinforced the Styrofoam-like DJI case with a layer of duct tape and the contents and case weathered the trip without too much wear. If I were to travel by plane more often, I would definitely look into a sturdier, third party Phantom 4 case to try, as long as it was still within the carry on dimensions that the airlines now follow much more closely.
I also recently took receipt of a dual operator Inspire X5R and am still in the testing phase with it on several projects. I’ll keep you posted . . . Happy flying!
Terry Holland
Source link